How To Make A Patch On Embroidery Machine: Step-by-Step Guide
Creating a patch with an embroidery machine is one of the best ways to add custom logos, names, artwork, and designs to clothing, bags, hats, and varsity jackets. Embroidery patches are durable, professional-looking, and easy to apply to various garments.
Whether you’re a beginner or looking to start a custom patch business, this guide will walk you through the entire process of making a patch on an embroidery machine.
What Is an Embroidery Patch?
An embroidery patch is a decorative piece of fabric stitched with a design using an embroidery machine. Once completed, the patch can be sewn, ironed, or attached with Velcro to garments and accessories.
Common uses for embroidery patches include:
- Varsity jackets
- Sports uniforms
- School apparel
- Business branding
- Military uniforms
- Motorcycle clubs
- Fashion clothing
- Backpacks and hats
Materials Needed
Before starting, gather the following supplies:
- Embroidery machine
- Embroidery digitizing software
- Embroidery thread
- Twill or felt fabric
- Cut-away or tear-away stabilizer
- Embroidery hoop
- Scissors
- Heat-seal backing (optional)
- Velcro backing (optional)
Having quality materials will help produce cleaner and more durable patches.
Step 1: Create Your Patch Design
The first step is designing the artwork for your patch.
Popular patch designs include:
- Company logos
- School emblems
- Team mascots
- Initials and monograms
- Club logos
- Custom graphics
Keep the design clear and readable. Small details may not stitch well, especially on smaller patches.
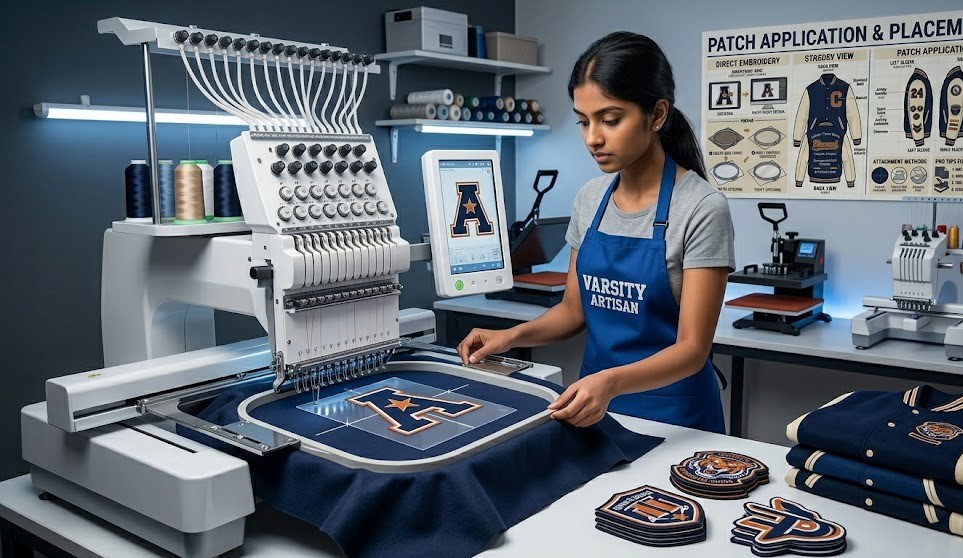
Step 2: Digitize the Design
Embroidery machines require designs in a digitized embroidery format.
Digitizing software converts artwork into stitch instructions for the machine.
Popular embroidery formats include:
- DST
- PES
- JEF
- EXP
- VP3
During digitizing, you’ll set:
- Stitch types
- Stitch direction
- Thread colors
- Underlay stitching
- Border settings
A properly digitized file is critical for professional-quality patches.
Step 3: Hoop the Stabilizer
Place a piece of stabilizer into the embroidery hoop.
Many patch makers use:
Cut-Away Stabilizer
- Strong support
- Great for dense designs
Tear-Away Stabilizer
- Easy removal
- Suitable for lighter designs
Ensure the stabilizer is tight and wrinkle-free inside the hoop.
Step 4: Position the Patch Fabric
Lay your patch material over the hooped stabilizer.
Popular patch fabrics include:
- Twill
- Felt
- Polyester patch fabric
Many embroiderers use temporary spray adhesive to hold the fabric securely in place during stitching.
Step 5: Stitch the Placement Line
Load the digitized patch design into the embroidery machine.
The machine typically begins by stitching a placement line or outline.
This outline shows exactly where the patch will be embroidered.
Check that the fabric covers the entire outlined area before continuing.
Step 6: Embroider the Design
Start the embroidery process.
The machine will stitch:
- Underlay stitches
- Fill stitches
- Lettering and details
- Decorative elements
Monitor the machine throughout the process to ensure:
- Thread tension remains correct
- No thread breaks occur
- Colors change properly
Depending on the design complexity, embroidery may take several minutes to over an hour.
Step 7: Stitch the Border
A strong border gives the patch a professional appearance and prevents fraying.
Satin Border
The most common patch border.
Benefits include:
- Clean appearance
- Professional finish
- Excellent durability
Merrow Border
A thick wrapped edge commonly seen on traditional patches.
Merrow borders usually require a specialized merrow machine after embroidery.
Step 8: Remove the Patch from the Hoop
Once stitching is complete:
- Remove the hoop from the machine
- Take the patch fabric out carefully
- Trim excess stabilizer from the back
Be careful not to cut the embroidery stitches.
Step 9: Cut Around the Patch
Using sharp scissors or a rotary cutter, trim around the embroidered border.
For best results:
- Follow the edge closely
- Leave a small margin if necessary
- Cut smoothly to maintain shape
Some professional shops use laser cutters for highly accurate patch trimming.
Step 10: Add Patch Backing
Depending on how the patch will be used, choose an appropriate backing.
Sew-On Backing
The most durable option.
Ideal for:
- Varsity jackets
- Uniforms
- Heavy-duty apparel
Iron-On Backing
Apply heat-seal adhesive to the back of the patch.
Benefits:
- Easy application
- No sewing required
Velcro Backing
Perfect for:
- Tactical gear
- Military uniforms
- Removable patches
Adhesive Backing
Useful for temporary applications and promotional items.
Step 11: Inspect the Finished Patch
Before applying or selling the patch, inspect it carefully.
Look for:
- Loose threads
- Missed stitches
- Uneven borders
- Color inconsistencies
- Fabric defects
Professional-quality patches should be clean, durable, and visually appealing.
Tips for Better Embroidery Patches
Use High-Quality Thread
Premium embroidery thread provides:
- Brighter colors
- Better durability
- Less breakage
Choose Simple Designs
Bold designs generally produce cleaner results than highly detailed artwork.
Test Stitch First
Always create a sample patch before producing large quantities.
Keep the Hoop Tight
Loose stabilizer can cause shifting and misalignment.
Maintain Your Machine
Regular cleaning and oiling improve stitch quality and reduce thread breaks.
Best Fabrics for Embroidery Patches
Twill Fabric
Most popular choice because it is:
- Durable
- Easy to embroider
- Professional-looking
Felt
Excellent for:
- Vintage-style patches
- School emblems
- Craft projects
Polyester Fabric
Offers durability and resistance to wear and tear.
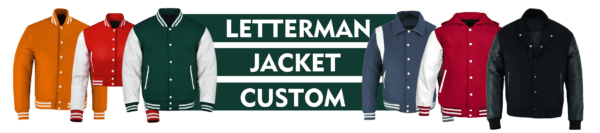
Using Embroidery Patches on Varsity Jackets
Embroidery patches are an essential part of varsity jacket customization. They are commonly used for:
- School letters
- Team logos
- Graduation years
- Athletic achievements
- Club memberships
- Personalized names
Custom patches help transform a standard jacket into a unique keepsake that reflects accomplishments and personal style.
Conclusion
Learning how to make a patch on an embroidery machine is a valuable skill for custom apparel businesses, hobbyists, and fashion brands. By creating a design, digitizing it properly, stitching it onto quality fabric, and finishing it with a professional border and backing, you can produce durable patches that look great on jackets, uniforms, bags, and more.
For custom apparel businesses such as LettermanJacketCustom, embroidery patches remain one of the most popular ways to personalize varsity jackets and create meaningful, long-lasting designs that stand out.